A Few More Chemo Caps

I haven’t blogged my knitting in quit a while, but I have been knitting a lot. I seem to always have at least two and sometimes three projects on the needles at any given time. Perhaps I get bored easily? Yes, that, and sometimes I have a complex project going and need something a little more “brainless” to work on.

I’ve completed a number of items since my last post. Here are the photos in order of completion.

chemo-02

This pattern was written for straight needles as well as circular. I actually completed it on straight originally. But when I tried to sew up the seam – ARGH! – it looked awful. So I ripped out the whole thing and re-did it on circulars after I got them. It was worth the wait as this turned out SO much better. I used Red Heart Soft Yarn in Really Red on size 8 circular needles.

chemo-03

This is called Ribbons of Hope Hat. It’s my first attempt at cables since I’ve started knitting again. I think a few expletives escaped my mouth as I was doing the first ones, but I caught on and it turned out just fine. I used Caron Simply Soft Light in Pansy on size 6 circular needles.

chemo-04

This one is called The Inside Out Knit Chemo Cap. I LOVE this one and will do more like it. It is very stretchy when done and would fit just about anyone. It’s super light weight, too. I used Caron Simply Soft Light in Hawaiian Sky on size 8 & 10 circular needles.

chemo-05

This is the Eyelet Rolled Brim Hat. As I was working on this one, I learned that my niece was diagnosed with breast cancer, so I thought of her quite a lot while working on it. She has had a mastectomy and reconstructive surgery and is doing well – they feel they got all the cancer out. It is not yet determined if she’ll need chemo – I hope not. Our knitting group went to a yarn shop where I found this great yarn. It’s Plymouth Yarn Dreambaby DK in Salmon (135). I used size 6 circular needles and the ladies small instructions.

chemo-06

My next hat is the Button-Tab Knit Hat. For me, the fun part with this hat is the finishing. I learned some new things in doing it. Plus, those buttons were sent to me about a year ago by my SIL, who is a cancer survivor herself. It just added to the whole project. I used size 7 circular needles and Red Heart Soft Yarn in Seafoam.

chemo-07

I bought this yarn with something completely different in mind. When I realized it wasn’t going to work for that project, I decided to use it on this pattern which I’ve wanted to do for a while. It’s called Art Deco. This is the most complex pattern I’ve done to date. Every row was different (it seemed) and I had to learn how to M1. Once I got the hang of it, making a stitch is actually pretty simple. I used Caron Simply Soft in Vanilla on size 8 circular needles.

chemo-08

This is the last of my completed caps/hats. It’s called Hurricane Hat and was a lot of fun to make – very simple, too. It came out fairly small. I don’t know if that was my knitting to tightly or what. It fit me (barely) and I have a pretty small head. If I make it again, I’ll use larger needles and/or add on a repetition of the pattern. For this one, I used Red Heart Soft Yarn in Navy on size 7 circular needles.

I have another cap on the needles, along with two scarves I’m working on. All of it will have to wait a while, though. I’ve apparently over done it and have “knitters elbow”. OUCH! I’m hoping a few days of no knitting and some ibuprophen will get me back on track. I miss it!

Until next time: Happy crafting!

My First Chemo Cap

I’ve come to the realization that just knitting scarves is getting old and boring. I like a little variety in my crafting and started looking further into places needing hand-made goods. One of the places I found is Halos of Hope. Their mission is:

We are a not-for-profit organization committed to providing in-need chemo patients with crafted hats donated by caring volunteers.

I started looking at their patterns and found one that I knew I just HAD to make. It’s called “Foaming Waves” and was designed by Maureen Keenan. Here’s a photo of my completed cap.

chemo-01

I used Caron Simply Soft Light in Pansy. I used size 6 needles (instead of 5’s) as I seem to knit a little on the tight side. I also followed the directions for the medium size cap. It’s a little big on me, but I have a pretty small head. I have confidence that it will fit someone.

I faced a few challenges along the way. I’m not an accomplished knitter, by any means. It may have been the size of the yarn, or just my inexperience with some new stitch combinations. I had trouble keeping the number of stitches right, even though I used markers for each pattern rep. I hope it will just take practice to have those issues eliminated.

The bottom row (the cast on) wants to curl up pretty badly. I attribute that to my “tight” knitting. I think if I do this pattern again, I will cast on to needles one size larger, just to get that row a little looser, then switch back to my size 6’s. Any suggestions?

I have a couple other things on the needles. I can’t seem to do just one thing at a time. I promise to share more photos as items get completed.

Till then, happy crafting!

Another Scarf Completed

As I mentioned in previous posts, I got a little tired of the same red and blue yarn required by the Special Olympics Scarf Project. I did ten in all and shipped them off last week.

So I found another group who needs hand-knit scarves. It’s called Christmas at Sea run by The Seamen’s Church Institute. They collect items all year long for distribution to mariners at Christmastime.

I’ve completed my first scarf for this project.

sea-01-done

This is the Seafarer’s Scarf pattern supplied by the organization. Mine looks a little different from theirs, but it does meet the dimension requirements. I used Loops & Threads Impeccable Big Yarn in Earth and size 6 US needles.

I’ve started a second scarf in the same yarn. The first scarf did not use nearly all of what I bought. This next scarf is a fairly simple 6x6 basket weave pattern (Mariner’s Scarf) also supplied at the Christmas At Sea web site.

Happy crafting!

My Tenth Scarf

I’ve had this scarf off the needles for quite some time. This week, I finally found the time to sit down and weave in the ends. Here’s the completed scarf done in alternating colors in seven sections.

10-done

I found the pattern for this scarf through Knitting Pattern Central. I enjoyed working this pattern as it was done on size 10 1/2 needles and it went pretty fast. I was really happy with how it turned out, too.

This is probably the last scarf I’ll do for the Scarves for Special Olympics Project this year. As I mentioned in a previous post, I’m a bit tired of these colors. I’m currently working on another scarf for another charity using a brown variegated yarn. But you’ll just have to wait to see what that one is about.

Thanks for looking in on what I’ve been up to. Happy crafting!
Two More Scarves Completed

Today, I finished two more scarves for the Special Olympics Scarf Project

Here’s the first of the two. It’s actually the 8th scarf I’ve completed.

08-done

I did the scarf in half red and half blue. I used the Tweedy Eyelet Scarf pattern I found on Ravelry. It’s four rows of knit stitch and then one row with yarn-overs to create the “eyelet” pattern. I took me quite a while to figure out how to tell where I was without ticking off my rows on a piece of paper. Once I did figure that out, however, the knitting started to go much faster. I really enjoyed doing this one.

This is the other newly completed scarf, my ninth for the Project.

09-done

It’s a standard basket weave pattern which I’d wanted to do for a while. I added a selvedge stitch on each side. It’s done in in four alternating sections of color (red & blue), mostly just to do something a little different.  Then I added the tassels on each end.

I have my tenth scarf on the needles right now, size 10 1/2 to be precise. So it’s going to go pretty fast. I’ll be back here to show it off once it’s all finished.

Thanks for stopping by. Happy crafting!

Scarves and More Scarves

I know it’s been a very long time since I’ve updated this blog with all the knitting I’ve done. In spite of not sharing, I have been quite busy knitting for the 2012 Special Olympics Scarf Project. I’ve completed seven scarves and have two more on the needles.

I’ll start back at the beginning. This is the first scarf I completed.

01-done

I used a pattern from the 2009 Scarf Project. It’s a simple knit 2, purl 2 done on size 10 needles. Since it was my first scarf, I opted not to change colors as often as the knitted pattern stated.

My second scarf was also based on a 2009 pattern. I’m afraid I wasn’t happy with how it was working, so I made a change and it caused the finished scarf to wrap in on itself more that it might have otherwise. I blocked it, but it still looks like a tube. I’ve learned a valuable lesson.

I didn’t get a photo of the completed scarf, but here it is when it was getting started, using size 9 needles.

02

I made it half red and half blue, the two colors required for the 2012 Project.

You may have seen my third scarf in a previous post, at least the beginnings of it. Again, I made the scarf half and half in color. This time I decided to add some fringe. That was partly because the scarf was done on size 8 needles and took quite a while to do. So, I could shorten the knitting time by adding 3” fringe. I found this pattern on Ravelry. I’m considering doing another from this pattern. I really liked doing it.

03-done

My fourth scarf hasn’t been posted here (nor have the succeeding ones). I think I discovered this pattern through Ravelry, but it came from the Bernat site. This one tried to curl some on me too, but not nearly as bad as my second scarf. I gave it a little steam and it wasn’t so bad. Again, I did it in half red and half blue.

04-done

This next one I made (number five) taught me some new things. The pattern (also found through Ravelry) called for an extra stitch on each end “for a selvage”. I’m not well versed in knitting and had to look up what to do with a selvage. I chose the “slip-stitch selvage” as described at Beyond the Basics. It made a very nice edging on the scarf.

05-done

This scarf was done on size 9 needles. I liked it so much that I did another one as you’ll see in a bit. I liked how the fringe came out on the previous scarf, so decided to do it again on this one, also done in half and half on the colors.

My sixth scarf is a repeat of the pattern used on my first scarf. Since that was was mostly blue with a little red, I decided to make this one mostly red with a little blue. I really like this pattern, too. It’s a simple knit 2, purl 2. It’s really scrunchy and soft. I hope the recipient likes it, too.

06-done

My seventh scarf is made from the same pattern as the fifth. This time I divided the scarf into five equal lengths of color. I could tell I was getting short on yarn, so had to be cautious as I went. I had more blue than red and this is the finished scarf.

07-done

When I started this project in May, I purchased four skeins each of the two colors. After completing these seven scarves, this is what was left of all that yarn.

IMG_0259

I have since used the red to start my eighth scarf. Red Heart yarn was on sale at Michael’s where I found more blue. I used 40%-off coupons for two skeins of red at JoAnn Fabrics. Nothing like reduced prices to feed my habits!

Here is the start of my eighth scarf. I found this pattern on Ravelry as well.

08

I’m using size 10 needles (unlike the pattern) and cast on 26 stitches. It will be a half-and-half scarf. I got a little carried away with knitting it and didn’t stop to change colors. It took me a while to learn how to tell when the eyelet row came up, so I did a lot of counting at first. Now I can see when to do it and it’s going a lot faster.

I can’t ever seem to just do one at a time, so number nine is also on needles. I had found this basket weave pattern some time ago, and even started working it. But I didn’t like how it was going. I think I chose the wrong size needles  or something. So I ripped it out and did something else. Now I’m back to it, using size 9 needles and I added the slip-stitch selvage to it. It’s going very well, now, and the edges look great.

09

I haven’t completely decided on the color scheme yet. But I am planning to put tassels on it. I think it will help the bottom edges lay flatter. Plus it adds a little interest to the scarf.

I’m so glad that my sister gave me the inspiration to work on this project. It was a great way to pass the time this summer, not only while traveling, but also on those quiet afternoons when nothing else was more pressing. I’m enjoying it even more than I expected.

Thanks for stopping by. Happy crafting!

Third Scarf

I have just completed my third scarf for the Scarves for Special Olympics project.

IMG_0199

The scarf itself is half red and half blue, then I added two strands of blue and two of red to each tassel. I used this pattern from Ravelry. It was fairly simple to do, but it took quite a while as it was done on size 8 needles. It’s tight and heavy and should be very warm for a Special Olympian next winter.

Its dimensions didn’t come out perfect, so I hope they won’t mind that it’s a little bit longer and a little bit skinnier than the recommendations. I’m very happy with it, in any case.

Thanks for stopping by. Happy crafting!
Scarf Update

I have successfully completed my first scarf for the Scarves for Special Olympics Project. It came out pretty well, considering I hadn’t done any knitting for well over 30 years. Here’s the finished scarf:

IMG_0030

It’s approximately 6” x 60” with only the two visible stripes done in red. The pattern called for more, but changing colors was more hassle than I wanted to deal with while on the road.

I don’t have a new picture of the #2 scarf. It was shown in my previous post. It is now a little more than three-quarters finished. It will be half red and half blue. I may post a photo when it’s finished – or I might not. Unfortunately it rolls up like a tube and I won’t be able to block it until I get home in September. I think it will look good when done.

I’ve started on #3. I found a pattern on Ravelry that I really liked, so I’ve started that. Here’s a picture of this new scarf – so far.

IMG_0046

It’s about six inches wide. It is done on #8 needles, so it’s going slower than the other two done on #10 and #9 needles respectively. There’s only one row to learn (and repeat) in this pattern. I’ve already messed it up a couple times, so I’ve found that I really need to keep my head on while doing it. Nothing wrong with that – just an observation. :-) I’m also thinking that I may add tassels to this scarf. It might jazz it up a bit.

I’ve got a couple other patterns picked out, but probably won’t start any additional scarves till I finish #2. I’m also toying with making another like #1, but red with blue stripes instead. It was easy, mindless and went fast. That may be a good thing for my next one.

Happy crafting!

Progress Update

I have done more knitting in the past week than I ever expected. As I sit down to write this, I have 26 inches of my first scarf done. I’m quickly approaching the halfway mark in my 60-inch project. It’s looking good, I must say.

This first scarf (for the Special Olympics) is a very simple pattern. It’s knit 2, purl 2 to the end of the row. Then it’s purl 2, knit 2 for the next row. Repeat until desired length has been reached. It’s an easy pattern, which is exactly what I needed to get started. However… it has become BORING!

So I decided to start a second scarf, just to break up the boredom and make me reach a little more. The pattern I’ve chosen for my second scarf is also not difficult. I’ve added a “yarn over” and a “knit two together” to the knit and purl routine. This puts “holes” in the piece.

Here’s a picture I took a day or so ago.

IMG_0786

I now have almost 8 inches finished. I plan to make this scarf half red and half navy. That way both of the colors will be in the scarf with minimal color changes. (I’m not a fan of color changes. LOL) I do like having the two projects going so that I can change up what I’m doing. So I guess there will be at least two scarves done for the Special Olympics folks. And I really am enjoying it.

Happy crafting to you!

It Shouldn’t Have Been That Hard

Some things in life go smoothly – others just don’t! But it had a happy ending.

As stated in my last post, I have decided to make a few scarves for the Special Olympics program. I also stated that I was unable to find both colors of the yarn I wanted to use. Well, that frustration continued!

The other day, I went to the local JoAnn Fabrics store. I was looking for that same pair of Red Heart Soft Yarns. They had a fair amount of Red Heart, but almost none of the Soft Yarn – and zero skeins of the two colors I want. So by that time, I’d been to three different stores and was the proud owner of only one skein of yarn. It shouldn’t be this hard to find that yarn!

We’d been planning a trip to Ocoee in the near future. We had a Groupon to try a restaurant we’d never been to. I knew there was a Michael’s near that restaurant location. So that plan got moved up in time.

I called the Michael’s store and asked if they had the two specific colors I needed. I was told there were 4 skeins of the red, but no navy. Well, OK, that would at least get me some of the color I didn’t have. With that information, we took off for Michael's and lunch.

When I got to looking at the red yarn at Michael’s, the numbers weren’t right! No, she didn’t tell me wrong, did she?!?! No, she didn’t – I was looking at the wrong number on the package. My bad! There were indeed four skeins of red, so I swept them into my basket and started for the check-out.

But wait! Why not double check for the navy? And sure enough, I was rewarded with several skeins of the correct color number. Woo hoo! I threw three of the navy into my basket and then headed again for the check-out.

It was a pain trying to find the yarns, but in the end I have more than I had planned on originally. By the time I found it, I was pretty committed to doing the project, so getting more is a good thing. I’m already looking at more patterns and planning my next scarf.

Now that I have the yarn I need, I have been steadily working on my first scarf. The pattern calls for repeated stripes of navy and red. OK, the easy stuff is handled, but how do you change colors? Enter YouTube – again! I learned what I needed to do and changed from blue to red.

From watching the YouTube videos, I decided to carry the one color up the stripe until it was needed again, thus not cutting and weaving in the colors. What I didn’t expect was how bad it looked. If it was a shorter stripe, or if the colors were more similar it might have looked fine. But I just didn’t like it – not professional at all. See it running up the left side? Ugly, right?

IMG_0779

I’m not an accomplished knitter, but I don’t want to send anything I wouldn’t like to wear myself. So I’ve decided to cut the yarns at the color change and weave them in so they disappear. Here’s how much better the red stripe looks after I did that.

IMG_0781

I’m leaving the tails hang, for now. They will get woven into the scarf in due time. Since I’m also basically lazy, I’ve decided to do the rest of the scarf in blue until I get to the other end where I’ll add another red stripe to balance it out. Then I will have minimal color changes and fewer ends to weave in at the end. And I think the scarf will still look great.

I’m sure I’ve given you way to much information. All of this has been rolling around in my head and now that it’s in print, I can forget about it. Tag, you’re it!

Happy crafting! And thanks for stopping by.

A New (Old) Craft Gets Under Way

As I was walking my three-mile route yesterday, I got to thinking about doing some knitting again. We travel in our RV in the summer and I can be a bit of a backseat driver if I don’t watch myself. So I was trying to think of something I could do and still be able to enjoy the ride. Knitting came to mind.

I remembered that my sister had made scarves for Special Olympics last year. That type of project seemed like just the ticket – something that was easy and wouldn’t require too much of my time.  So I did some research when I got home and then wrote my sister for HELP!

I haven’t done any knitting in at least 30 years! So I went looking for help in casting on and other such important thing. Then I picked a couple of (hopefully) easy patterns from the Scarves for Special Olympics site. I made a shopping list and planned to have everything I needed by now.

We went to Wal-Mart which indeed stocks Red Heart yarns. They even had a few colors in the Soft Yarn… but not the two colors I need for this project! Luckily, I was planning a trip to Michael’s anyway. They had the Soft Yarn, but only the navy, not the red! (Insert frustrated expletive here.) I went ahead and bought one skein of the navy in hopes of finding the red soon. I guess I’ll have to plan a stop at JoAnn Fabrics this week.

I had visions of posting a picture of all my new knitting stash and it would be something t0 be proud of. It’s not what I’d hoped, but here’s what I’ve got so far.

IMG_0777

All the patterns I found at Special Olympics were done on needles of size 8, 9 or 10. So when I saw this multi-pack with those sizes in it at Wal-Mart, I grabbed it. And here’s my one, lonely skein of yarn.

Hey, it’s a start, right!?!? I may have to modify a pattern until I get the red yarn, maybe half-and-half instead of stripes. We’ll see.

I’ll keep you posted. I’m excited about this project.

Happy crafting!

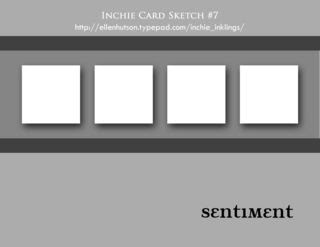
Inchie INKlings #7

This is the sketch from Inchie INKlings for the current challenge:


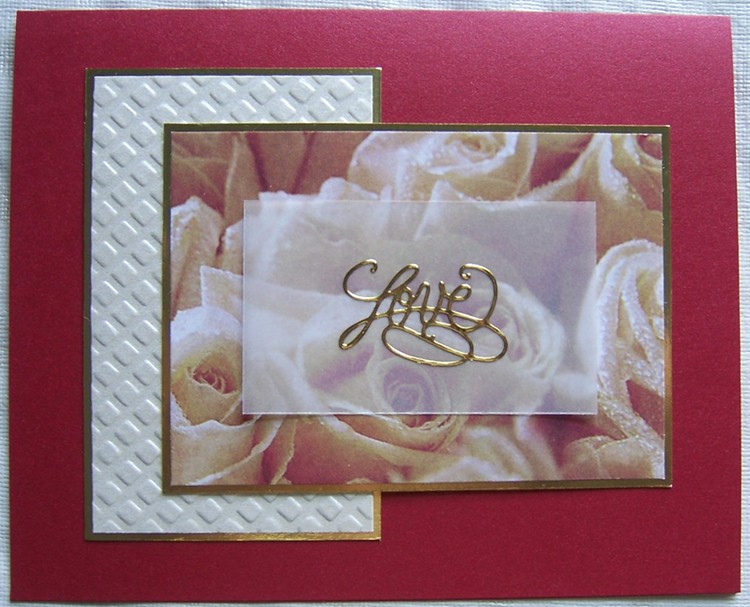
This is the card I made, based on the sketch:


Thanks for stopping by.

OWH S&S Challenge #16

Here is the Stars and Stripes challenge sketch for this week:


And here is the card I made, based on the sketch:


Thanks for stopping by.

OCC Sketch Challenge 12

Here is this week's Our Creative Corner sketch:


And here's the card I made:


This is another card made to be sent to the great people at Operation Write Home.

Framed Paper Crafting

We had some friends over for dinner a couple weeks ago. At one point, the conversation turned to my card-making. They asked to see some of what I'd done, so I brought out my inventory for them to "ooh" and "aah" over. I also showed them the framed work I had done after the craft fair. It was really fun for me to show off what I so love doing.

Then about a week ago, I got a call from a lady who knows one of those dinner guests. She'd been told of my paper crafting abilities and wanted me to frame her granddaughter's wedding invitation. We talked a bit and I agreed to do the work.

She brought over the invitation:


The wedding will be held locally at the winery up the road and the reception will be held here at Royal Highlands. In keeping with the wine theme, the bride's color is merlot. We struggled a bit to find a background paper in my stash that would come close enough to the real thing. Carol took several sheets back to her house and picked one which was pretty close to the actual dress..

I bought the frame and a few other supplies and went to work. I had a couple of ideas already laid out in my head and just had to work with them until I found just the right combination. Here's the finished piece:


I'm still letting the glue dry which is holding on the white flowers. I'll call Carol tomorrow and let her know she can pick it up. I sure hope she'll like it as much as I do. :-)

OWH S&S Challenge #13

The sketch challenge from OWH Stars & Stamps this week is this:


Here is my card based on this sketch:


Here is the inside:


Again, I used the "recipe card" concept to include a full sized sheet of writing paper for the sender.

Thanks for looking.

OWH Challenge #12

I've been making cards for Operation Write Home for the past several days and finally got around to doing the sketch posted at their Stars & Stamps Blog.


Here's my card based on the sketch:


In addition to using the sketch, I also used the "recipe card" tutorial to make the pocket inside to hold a full sized sheet of writing paper.

I hope some soldier will enjoy sending this card.

CPS-162 for Operation Write Home

This week's CPS sketch is this:


Here is the card I made, based on the sketch:


Here's the inside of the card:


And now for the story: I have been following the Operation Write Home organization for about a year. I sent them a bunch of Christmas cards last winter and have wanted to do more. They recently posted a tutorial on making recipe cards. With a little pocket inside, it is even easier to include a full size sheet of  writing paper folded up inside the card. So I tried making one and realized how very easy they are to make.

I started with what I call "cheater" cards, ones that use printed fronts with few embelishements. I had a number of sheets already printed, primarily E-Cuts from scrapbook.com. I went through those and came up with 7 cards in almost no time. Here are those cards plus one with a hand-made paper flower that is from Fred-She-Said. All nine of the cards are a finished size of 5.5 x 4.25.


In case you are not familiar with Operation Write Home, this is their mission:

Supporting our nation's armed forces by sending blank handmade greeting cards to write home on, as well as cards of gratitude to encourage them.

So we make the cards and send them to OWH. They collect our hand-made cards and ship them to where ever our troops are stationed. Its a wonderful cause and a great way for us card makers to give back. Check them out.

One thing...

Have you ever noticed how one thing can lead to another? Here's my quick story about that.

I've been making greeting cards for some time, now. I've been selling some to friends and relatives and one or two online. I sold a respectable number at our community craft fair in the Fall, and even more at our recent Spring fair.

Once or twice along the way someone would comment about not wanting to send the card but wanting to frame it instead. That's what one lady said to me at the recent fair. She actually bought one of my cards with a specific frame in mind. Unfortunately, that card turned out to be a poor color choice for the frame she had in mind. So she brought me back the card along with the frame and asked me to make something to put into it. She also brought a second frame for the same purpose.

Here are the original card and what I made instead to put into her first frame.


The second frame was a bit more of a challenge, only because I had the "perfect" shade of blue paper to put into it, but not a large enough piece to use. After much searching, I finally found a (rather large) piece of heavy card-stock in the painting isle at Jo-Ann Fabrics. It wasn't an exact match to the original, but it was the closest thing I could find anywhere.

I had already mapped out my pattern so the working of the piece went fairly quickly. Here is the final result for her second frame.


Having been asked to actually create something specifically for a picture frame has gotten me to thinking. Why not do it ahead of time and sell frame and artwork at the next craft fair? Why not, indeed! So now I'll be on the lookout for interesting and inexpensive picture frames that might lend themselves to my style of artwork.

Look out world! Making cards has just let me to a whole new artistic outlet!
Copyright @ Crafty DJ | Floral Day theme designed by SimplyWP | Bloggerized by GirlyBlogger